Search Blog


Simple Blogger Post Slider With Carousel Effect

Post slider is a awesome way to impress your audience.you can place this slider below header.you can add link in this post slider.you can add feature post or popular post,You can add link of your choice its totally customize widget to add any link for slider in blogger.you  have no need to edit your template, just add this widget in gadget of html/javascript by going layout of blogger.this slider become in action when you mover your cursor over slider image and if you click on image it will redirect to link of post you added.when you move cursor toward right slider post move to show more post behind while moving toward left it show more post same wise.


feature post slider for blogger


In below image you can see slider boarder is blue but we can change it.i will describe customization of slider and post.you can change url link to image and when you hover your mouse you can see title of post.It can also be change.while if you want to add more post in slider then you have to do few more step, i will also describe how to add as many post as you want in slider.


How to add feature post slider

Login to blogger account go to layout

Add gadget of Html/javascript 

Paste below code there.

<style>    #BloggerSpiceCarouselSlider {      height:130px;      background-color:#ffffff;      border:2px solid #3399ff;      position:relative;      margin:50px 50px;      overflow:auto;    }        #BloggerSpiceCarouselSlider:before,    #BloggerSpiceCarouselSlider:after {      content:"";      display:block;      position:absolute;      top:0;      bottom:0;      left:-4px;      width:4px;      height:100%;      box-shadow:0 0 4px black;      z-index:10;    }    #BloggerSpiceCarouselSlider:after {      left:auto;      right:-4px;    }/* CarouselSlider by 5gblogger.blogspot.com  */    #BloggerSpiceCarouselSlider .container {      position:absolute;      top:0;      left:0;      margin:5px 0 0 5px;      width:300%;      height:120px;    }    #BloggerSpiceCarouselSlider figure {      display:block;      background-color:white;      float:left;      width:150px;      height:120px;      margin:0 5px 0 0;      position:relative;      overflow:hidden;    }    #BloggerSpiceCarouselSlider figcaption {      display:block;      position:absolute;      right:0;      bottom:-50px;      left:0;      background-color:black;      font:italic normal 11px Arial,Sans-Serif;      color:white;      padding:4px 10px;      text-align:left;      opacity:.8;    }    #BloggerSpiceCarouselSlider figure img {      display:block;      border:none;      margin:0 0;    }    </style>    <div id="BloggerSpiceCarouselSlider">        <div class="container">            <figure>                <a href="#" title="Title for Caption">                    <img alt="" src="https://blogger.googleusercontent.com/img/b/R29vZ2xl/AVvXsEjTjMw-CeQaBs6Q8Y1Rvu8nZHqkMZ3S9UWjYuazi706J8rFtJii-a1GXfqamdVwQD8H2lhE7-jK7_vtk_1OPjKntBPvQ993zW1ElAASdGd51lTp9VJUpMkJLzgzYeoxRCS38yt6tiOxTxU-/s1600/7.jpg" />                </a>            </figure>            <figure>                <a href="#" title="Title for Caption">                    <img alt="" src="https://blogger.googleusercontent.com/img/b/R29vZ2xl/AVvXsEjlvhwswF4FaoCuX-bGWbXIXO4VURiC2Q9fll1iq2i_iOkwF1qzGvDRAWITzRJUNfXjdUx0c0wy1uJZasz4da8T3q-l-TJZxmeQlABnHJakfMZHMyPKKKh7ef9FjgvsO22BPXHtUA6bZE_X/s1600/9.jpg" />                </a>            </figure>            <figure>                <a href="#" title="Title for Caption">                    <img alt="" src="https://blogger.googleusercontent.com/img/b/R29vZ2xl/AVvXsEjoHq3oDJYIJITOPe-gMILkA_AahJP-42Q78r8S1XmtL4QxhizieZBDvGJfcQYym3FpOoKG0jl_OpEy201xW-bVi8Z-yEv0f5YYqCuqE5L8dAsHszn6Q9872uuhDTC2DWKoKr4U192ZQt4B/s1600/10.jpg" />                </a>            </figure>      <figure>                <a href="#" title="Title for Caption">                    <img alt="" src="https://blogger.googleusercontent.com/img/b/R29vZ2xl/AVvXsEgnNRP73MYQYPVx7FX2W6dbTZZOhcPDZDeNHVfJgdrCaT0EqxD9cV6ZNX3Ohj2_jORauqbZ0KQjKjLEC2Aerw3dpZTA4zD6ldl1o-uGe_V05TZyG-2NqNlSCUYM5fPatTql8ggNi-TPRv3E/s1600/8.jpg" />                </a>            </figure>            <figure>                <a href="#" title="Title for Caption">                    <img alt="" src="https://blogger.googleusercontent.com/img/b/R29vZ2xl/AVvXsEhgVnb6hyo-8qNd55kEgZz7bC1Rv5QLMWkYk_KPTuMDVlyz2qxKk42Y_szUhCEq-a_3bdRROcB8qpJCUnaQvJlTK0vSPb4topcNDviwNtYiAeWim2MUnNuL6i8lE6Xy3y2l1Bhoevaxoufd/s1600/6.jpg" />                </a>            </figure>            <figure>                <a href="#" title="Title for Caption">                    <img alt="" src="https://blogger.googleusercontent.com/img/b/R29vZ2xl/AVvXsEiQFgJcebk5BHb14Py7gb-I8ZPHYaCshpEXUwbJZBNh0PUpdZdEpBT7bIe3E-gWoJjkp_3UdFKKofeD77PTDVWEvS9CawDGJ1g1UaCMvMzU1P8HaGzjWrrXELBRbGwmiN9m8V_rSY6X3-mL/s1600/4.jpg" />                </a>            </figure>      <figure>                <a href="#" title="Title for Caption">                    <img alt="" src="https://blogger.googleusercontent.com/img/b/R29vZ2xl/AVvXsEgOczrUjVemE-2HKkNPCXiaGRC11FQuvQtsr1YXNrQjP6MWssMoRX11uxgj0YeHqnUcPqZ9tryQd5vurn-quGKggiV8sImqp2R6Fcann7sB2OqvtmfXkjwNUssTeQpssWKDZsBlicf_D4B7/s1600/3.jpg" />                </a>            </figure>            <figure>                <a href="#" title="Title for Caption2">                    <img alt="" src="https://blogger.googleusercontent.com/img/b/R29vZ2xl/AVvXsEiRMGGh7NiSYGOSObVJG_ZcfcQGpDq4JteCsxCWbUStyRD_OMKXu4mVzwC6TlToykO-Kww8yGCtLrKe499hazs2zFDBdA-cnB6SA0cgin2RSJse30kRNytwS-n8mG7skv8hutlnP0TL-s_k/s1600/2.jpg" />                </a>            </figure>            <figure>                <a href="#" title="Title for Caption">                    <img alt="" src="https://blogger.googleusercontent.com/img/b/R29vZ2xl/AVvXsEjPU3ey6QMPuTidu8U-Pa0BKThzCM1EOlB2INhDpRo7_69NpMmoW_YiW90WcKj-2AqlvQYkx3wud8weygjlXFRPJ1VL7f7oT7Rq2iVR3wxsYzDVCRveh2Z9CvhxweKgWsCDVOU5fyugsbaZ/s1600/1.jpg" />                </a>            </figure>        </div>    </div>
    <script type='text/javascript' src='https://ajax.googleapis.com/ajax/libs/jquery/1.7.2/jquery.min.js'></script>    <script type='text/javascript'>//<![CDATA[    (function($) {        var config = {            itemMargins: 5 // Distance between the thumbnails        };        var $thumbnailScroller = $('#BloggerSpiceCarouselSlider'),            $container = $thumbnailScroller.find('.container'),            $item = $container.find('figure'),            item_length = $item.length,            item_width = $item.outerWidth(),            item_margin = config.itemMargins,            total_width = (item_width + item_margin) * item_length,            $window = $(window);        $thumbnailScroller.css('overflow', 'hidden');        $container.css('width', total_width);        // Auto caption builder & hover effect        $item.each(function(cap) {            if ($(this).children().attr('title')) {                cap = $(this).children().attr('title');                $(this).children().removeAttr('title');                $(this).append('<figcaption>' + cap + '</figcaption>');            }        }).hover(function() {            $(this).find('figcaption').stop().animate({                bottom: 0            }, 200);        }, function() {            $(this).find('figcaption').stop().animate({                bottom: -50            }, 200);        });        $window.on("resize", function() {            var o_l = $thumbnailScroller.offset().left,                t_w = $thumbnailScroller.width(),                c_w = total_width;            $thumbnailScroller.on("mousemove", function(e) {                if ($(this).width() < $container.width()) {                    $container.css('left', -((e.pageX - o_l) * (c_w - t_w) / t_w));                }            });        }).trigger("resize");    })(jQuery);    //]]>    </script>

Place the gadget below header and do not forget to save arrangements.


How to change image and links in slider

You will find many section like this in above code highlighted in red color.


<figure>
                <a href="#" title="Title for Caption">
                    <img alt="" src="image url" />
                </a>
            </figure>

Change # with link of your post link

Replace Title for Caption with your post title, use small title for post.

Upload your image on blogger or any where on internet.copy your image url and replace it with image url in slider.

Remember use image of 150px width x 120px height


Save gadget after every change.Enjoy beautiful post slider in blogger.I have tested this slider widget, it is working fine but if you have any problem in installing feel free to ask me.Also hit like if you think this post is helpful.
{ Read More }

Add Live Recent Visitors Details In Blogger

If you want to track your live visitors information and other details like which post they visit , the time of visit and country.you can know all detail on your visitors and also make your visitors tell about this.This is live recent traffic feed widget.In blogger yo have to add it manually while direct installation option is also available to add live traffic feed in blogger.live recent traffic feed also tell the time of visit,live recent visits help to increase your page views.before adding it let me tell yo about this widget.

live recent visitors


Live traffic feed

you can customize live visitors feed.you can select how many visitors will be show like ten or more you can customize the widget easily.you can change the widget of live recent widget according to your blog sidebar.you can change color background,color of text color of link border color and other customization.you can view in above image the sample of live traffic recent visitor details.


adding live recent visitors information is very simple.As very template is different and every person has different choice live traffic widget allow to customize widget to their choice.This is very popular and all over the world blogger using this widget you may have seen it on some one other blog.live recent visitors details help to increase your blog exposure to your visitors.It also tell visitors what other people viewing on your blog and if they like it they can click on link and visit the post hence this way live traffic feed increase your blog visits.


How to add live recent visit feed

Adding live recent visitors feed take only few minutes to add in blogger.

1 First you have to customize feed about according to your requirement.

2 For customization go to below link

http://feedjit.com

custom widget

3 The above image is the view of customization.After selecting option for customization click go.Make sure you have select blogger blog in option.

you will be redirected to new page.copy that generated code.


4 Now login to blogger account go to layout add gadget of HTML/Javascript  and paste that code there and save it.

you can share your experience of live recent visitors information.Although every person has its own view.i would like to read your comments.
{ Read More }

Add Share To Unlock Social Content Locker In Blogger

Social sharing website are very popular now a days.Social content locker widget helps bloggers to gain little more likes and shares.This content locker widget include facebook, twitter and google plus share buttons.Billions of people daily visit social sharing websites.you can not ignore its importance, it is a good way to boost your traffic.Many professional blogger only getting traffic from social sharing sites.Search engine are updating algorithm frequently, social signals are also make count in your website ranking.I personally experience its value when i start using facebook twitter and other websites for promotion of website.

share to unlock in blogger

It is a bare fact that all blogger add social sharing buttons in their blogs but still there are some people who do no like to appreciate your work.They have enough time to read the article but they have no time to share and like your post.Actually they have time to like but they do not hit like button.Today i am introducing you a widget for blogger that can force your readers to hit on share button.

Today we will add social content share locker in blogger.you can lock any downloading link or any other content.When visitor go to that page, a pop up appears, which ask to like and share to unlock.If you lock a downloading link and visitor try to click on that link, spontaneous pop up appear asking to hit like and share button to unlock content

How to add share to unlock in blogger


Search for

</head>

Before </head>  paste the given code

<link href='https://dl.dropboxusercontent.com/u/137869302/lockercss.css' rel='stylesheet' type='text/css'/>

Save the template.

Make new post or edit old post.Go to Html editor of post.

Paste the below code.

Replace "Add_Hidden_Image_Here" with the Image url you want to lock.
Replace "Add Your Hidden Text Here" With the text that you want to lock.

<article id="default-usage">
<div class="to-lock" style="display: none;">
   
<!--Hidden Content Starts (You can Use HTML BELOW)-->
<div style="text-align: center; margin-bottom: 20px;">
<img src="Add_Hidden_Image_Here" alt="" style="margin: auto;" />
</div>
<div style="text-align: justify">
Add Your Hidden Text Here</div>
<!--Hidden Content Ends (You can Use HTML ABOVE)-->
</article>
</div><div id="mblunlocker"> </div>
<script type="text/javascript" src="https://dl.dropboxusercontent.com/u/137869302/lockers.js"></script>
<script>
jQuery(document).ready(function ($) {
$("#default-usage .to-lock").socialLock({
text: {
header: "Share it To Unlock This Content",
message: "Yes, this is Social Locker. Just try it, click on one of buttons."
},
style: "ui-social-locker-secrets",
buttons: {
order: ["twitter", "facebook", "google"]
},
// twitter options
twitter: {
url: "https://twitter.com/your account",
text: "Upgrade your social buttons to get more social traffic!"
},
// facebook options
facebook: {
url: "https://www.facebook.com/page url",
appId: "1469022373353333"
},
google: {
url: "https://plus.google.com/u/0/115165309413108113943"
}
});
});;;;
   
</script>

Now Replace the Twitter, google plus link with your pages, also change facebook page and api with yours which is Highlighted in red color.


Recommendation

Try to avoid using social sharing content locker on every post because it can make visitors irritate and they can leave your blog.your content locker widget share to unlock is installed.Now its your turn to hit like button.

Search Tags:like to unlock, share to unlock widget for blogger,social content locker for blogger.

{ Read More }

Add Contact Us Form ON Specific Page In Blogger

Adding contact page is very beneficial because people can contact you directly via.It is the way of communication with blogger and visitors.some blogger do not like contact form because they think comments is enough to talk with viewer while some bloggers think adding separate contact us form in top navigation bar is good for conversation because this is the private conservation with viewer and blogger.some people ask how to add contact us form on specific page like static page.we add other pages like  home button so if you want to add contact form on specific page then you may need little bit effort.


contact us on specific page


why to add contact us on specific page

If you are trying to add contact us form on sidebar instead on specific page then you  need few simple step.you add can official contact us form from layout add gadget.It is your choice either you want to add contact form on specific page of on sidebar.Mostly contact us form can be seen in top navigation menu at static page.mostly blogger add on specific page because contact us can easily seen from top.

add stylish contact form in blogger


How to contact us form on certain page


1 First login to blogger account


2 Go to layout add gadget and click on  more gadget

3 Add contact us gadget in your blog.


4 Now go template and find this code by pressing ctrl+f


]]></b:skin>

5 paste the below code before ]]></b:skin>


div#ContactForm1 {  display: none !important;}

visit your blog now you can see your contact us form disappear.

If it is still not disappear then go to template and click customize > go to advanced > click add css and paste above code there and click apply to blog.

6 Go to pages add new page. write title if want your write.

7 Now go to Html of post, as you can see in below image


editing html of page

8 Paste the blow code there.


<div dir="ltr" style="text-align: left;" trbidi="on"><br /><style>.twist_blogger_cntct_form_wrap {  margin: 0 auto;  max-width: 840px;  padding: 0 10px;  position: relative;  background-color: #FDFDFD;}.twist_blogger_cntct_form_wrap:after, .twist_blogger_cntct_form_wrap:before {  content: '';  display: table;  clear: both;}/*----Change Contact Form Background Color Here----*/div#twist_blogger_cntct_form {  padding: 20px 20px 10px 20px;  background: #009fff;  border-radius: 2px;  margin: 20px auto 20px;  color: #FFF;  font-size: 16px;  max-width: 260px;}input#ContactForm1_contact-form-name, .contact-form-email, .contact-form-email:hover, .contact-form-email:active, .contact-form-email-message, .contact-form-email-message:active, .contact-form-email-message:hover {  padding: 5px;  box-shadow: none!Important;  min-width: 186px;  max-width: 260px;  width: 100%;  border: 0 !important;  line-height: 1em;  min-height: 31px;  background: #FCFCFC;  margin-bottom: 15px;}/**** Submit button style ****/.contact-form-button-submit {  background: #009fff;  font-size: 20px;  letter-spacing: 2px;  cursor: pointer;  outline: none!important;  color: #FFFFFF;  border: 2px solid rgba(255,255,255,1);  border-radius: 50px;  min-width: 186px;  max-width: 260px;  width: 100%;  text-transform: uppercase;  height: 46px;  margin-top: 10px!important;  transition: all 300ms ease-;  -webkit-transition: all 300ms ease-in-out;  -moz-transition: all 300ms ease-in-out;}/**** Submit button on mouse hover ****//**** widget by 5gblogger.blogspot.com ****/.contact-form-button-submit:hover {  border: 2px solid;  color: #FFFFFF;  background: #24a7f6!important;}/**** Submit button on Focus ****/.contact-form-button-submit:focus, .contact-form-button-submit.focus {  border-color: #FFFFFF;  box-shadow: none !important;}/**** Error message and Success Message ****/.contact-form-error-message-with-border .contact-form-success-message {  background: #f9edbe;  border: 1px solid #f0c36d;  bottom: 0;  box-shadow: 0 2px 4px rgba(0,0,0,.2);  color: #666;  font-size: 12px;  font-weight: bold;  padding-bottom: 10px;  line-height: 19px;  margin-left: 0;  opacity: 1;  position: static;  text-align: center;}</style>
<br /><div class="twist_blogger_cntct_form_wrap"><div id="twist_blogger_cntct_form"><form name="contact-form">Your Name<br /><input class="contact-form-name" id="ContactForm1_contact-form-name" name="name" placeholder="Enter your name here..." size="30" type="text" value="" /><br /><br />Your Email*<br /><input class="contact-form-email" id="ContactForm1_contact-form-email" name="email" placeholder="Enter your email here..." size="30" type="text" value="" /><br /><br />Your Message*<br /><textarea class="contact-form-email-message" cols="25" id="ContactForm1_contact-form-email-message" name="email-message" placeholder="Write your message here..." rows="5"></textarea><br /><input class="contact-form-button contact-form-button-submit" id="ContactForm1_contact-form-submit" type="button" value="Send" /><br /><div style="max-width: 260px; text-align: center; width: 100%;"><div class="contact-form-error-message" id="ContactForm1_contact-form-error-message"></div><div class="contact-form-success-message" id="ContactForm1_contact-form-success-message"></div></div></form><br /></div></div></div>


9 Use this setting for contact page.


10 click on compose and click publish.


11 Go to  layout and edit page menu widget

Then new pop up appear click add external page


12 Write title contact us.copy the url of page you made recently.paste the link in the option and save it. Make sure check box is selected because template show only selected pages.


Now visit your blog and your process is finished.Enjoy colorful contact form in specific page.


How to check your messages

I also want to tell you how this work and how you can check message sent by people via contact form.when people want to contact you they go the page.they have to provide their name email and there message at the last.when they press send button then message take some time to be delivered.To check your contact messages go to inbox of gmail account.when you go inbox you can see top categories primary message, social and promotional.Messages sent by contact form can be read easily in primary.

I have check, this contact form is working fine.If you want to

confirm you can send message via contact form.Do not use current blogger email for sending message via contact form then you can check your email.To reply contact message you have to reply to mail from your gmail account.
{ Read More }

Add Stylish Animated Flying Twitter Bird In Blogger

All professional bloggers know the importance of social media networks.It is good way to promote your blog.There are many social network but twitter is the most likely for content promotion and bloggers always keep their followers up to date.today i will describe you how to add twitter bird.It is very lovely and cute widget mostly like by visitors and bloggers.Actually while browsing when visitor scroll their mouse cursor the flying bird move from bottom to top,it looks like animated widget and it is very attractive widget because it catch the attention of visitors.


animated twitter widget for blogger


How to add twitter bird widget in blogger blog

Adding twitter widget is very easy as i already discuss the significance of this gadget, it help visitor to tweet your article
easily.


First go to template and edit html

Press ctrl+f inside template code area

Now you see search pop up appears.

Find this code


Above </body> paste the following code

<script src='http://bloggerblogwidgets.googlecode.com/files/way2blogging.org-tripleflap.js' type='text/javascript'>
</script>
 <script type='text/javascript'>
var twitterAccount = "username";
var tweetThisText = " <data:blog.pageTitle/> : <data:blog.url/> ";
 tripleflapInit();
 </script> 

Note:
At the bottom of code you can see word username.

Find username in above code and replace it with your twitter username.

save the template.now view your blog and enjoy beautiful flying bird.
{ Read More }

Add Stylish Thread Comments In Blogger

Add new feature of threaded comments in your blog that can make your blog more beautiful. This enables visitors to reply directly in response to comment.reply option is on the left side and it separate every discussion.adding new comment will start new discussion.

adding thread comment in blogger

why to add thread comment

First let me tell you some feature and distinct facts.It help to communicate with admin more easily and effectively.It makes your comments like discussion in thread system.It show date and number of reply with image thumbnail at the left side.
Also:Add smiley emoticons in blog

How to add thread comments in blogger

Go to setting > other and make sure that allow blog feed is set to full

Settings>Posts and Comments and make sure that comment location is set to embedded.

search for this piece of code


just above </b:skin> add this code


 save your template.

Visit your blog  you can view a post comments section and you can see a reply button under existing reply.When you click reply then new text box will appear and this way when you publish more reply it make a thread.I hope you will enjoy this beautiful feature.
{ Read More }

How To Add Smiley Emoticons In Blogger Comment

Emoticons and smileys is good way to attract attention. We use these icons in chat and emails.we can also add in blog comments.We use these smileys to show our feelings, anger, love confused smiling or crying. These small and cute faces of cartoon help us to send our expressions and what we are thinking just in one click.It can make the discussions more interesting.
Also:Add image hover effect

how to add smiley in blogger comment


why to add chat emoticons in blogger

These emoticons become popular in blogging . Every person wants to show feelings and they like to express the feeling by cute smileys and emoticons.bloggers can add these emoticons in their blog just editing some changes in their template.many other blogging platform using emoticons but we can also add these emoticons/smileys in blogger but the method is different. You can use the chat icon while commenting or replying.
Add label with hover effect

How to add smiley emoticons in blogger comments

Login to blogger and go to template.

click on Edit template press ctrl+f and search this code.


above </head> paste the given code.


Again find the code


paste the given code above  </body> 


Save you template.visit your blog and enjoy beautiful emoticons.if you have any question ask me in comment.i would like to hear you.
{ Read More }

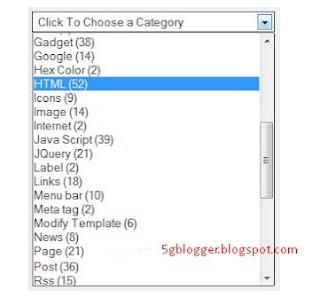
How To Add Drop Down Label Widget In Blogger

This tutorial is of category list and for drop-down label menu.It work or show list of labels mostly shown  at the side bar while you can change the position of gadget.

If you want to decrease main navigation bar size, this can help to you do so.this drop-down menu display your label categories,and labels are link with them.each category show post added in label .you can adjust size of the drop-down. follow these steps to add it to your blog.

drop down menu of lablel

Adding drop down category widget in blogger


login to blogger account Go to template and edit HTML


 Find below code by using Ctrl+F 


Replace above line with below code.


now save your template and go to your blog and check either widget is working correctly or not. 

if you had any problem you can ask me in comment.
{ Read More }

How To Make Your Comment Box Dofollow In Blogger

Leaving your blog link on others blog comments is a good idea to generate extra traffic to your blog.In blogger template attributes for links in comment are already defined.Usually we have two attributes, you may already know.Nofollow and dofollow, these are the attributes that search engine bot read while crawling the page.By default blogger set nofollow attribute for comments links.As we know search engine bot give preference to dofollow links, so we will change nofollow comments to dofollow comments.
how to dofollow comment box in blogger


Why we make changes

Also it gives benefit in search engine ranking.As we know search engine show top ten result for any searched query.we can change the no of results show per page by customizing setting but this not our topic.These top ten result are high rank websites in specified niche.by making nofollow comment to dofollow we can increase our blog traffic, because many other blogger look for dofollow blogs for comments.After changing your blog to dofollow comments,you should share your blog on forums and other blogs comments.


Some newbie post to many comment on each blog and start putting their link inside comment box.This is not good idea and even some non professional bloggers put irrelevant and spammy links.To avoid spammy link you must check your comments and remove irrelevant comments.Do not allow comments with lot of links.

Remove nofollow tag from blogger comments

Step 1 login to blogger account and go to template of blog

Step 2 Click edit html, press ctrl+f  and search this code

<a expr:href='data:comment.authorUrl' rel='nofollow'><data:comment.author/></a>

Step 3 Replace it with below code.


<a expr:href='data:comment.authorUrl' rel='dofollow'><data:comment.author/></a>


Step 4 Save your template, you have done.

Make external links nofollow


Your process is complete you can view your blog.Now all link inside comment become dofollow.I hope it will help you,As you can see related topic above on making external links nofollow.Actually they are dofollow and Some people do not want dofollow external links so follow the instruction.Every person have different thinking but i think it is better to make changes according to your requirement.
{ Read More }

How To Backup And Restore Blogger Template

Blogger template can easily access and edit to modify your layout and design.getting backup is very necessary because while adding a widget we may need to edit template and if you are not very well aware of coding you can made mistake in template and only one mistake can totally change the design.

To avoid unwanted changes in you blog design.you have to get backup so that you can restore it later.you can save the file in your computer that can be upload to restore your template.
blogger template


How to get backup of template

It is very easy to get backup.

First login to your blogger account

Now click on the left side template

At the top Right corner you can see backup and 
restore option as you can see in image above.
click it.


New pop up appear to get back up click
download full template

upload file


Now you template file is downloaded in your computer.
keep it save.

Restore the blogger template 

To restore you have to repeat the above process but now instead of
downloading template upload the xml file of template that you save recently.

Your process finish.If you have any query or problem just ask me.
{ Read More }

How To Find And Add RSS Feed In Blogger

Many people asked me how to find RSS feed for Blogger blog, that why i made this post.It is effect way to get more visitors, people can subscribe your rss feed, if they like your blog content. It allows to connect with your content and hey will know about news post in your blog.Finding the RSS feed address in Blogger is not hard task.you may not believe some bloggers want to remove rss feed from their blog, its depend on the author of blogger.I personally found rss feed effective tool.basically these are of two types, first is atom and second in rss.Also we can customize it to our requirement, like we can add full site feed, label, comments or individual post.I am giving you example of all rss feed given below.
find my blogger blog rss feed


Finding Rss feed url

Full site feed:


RSS 2.0: http://blogname.blogspot.com/feeds/posts/default?alt=rss

Comments-only feed:


RSS 2.0: http://blogname.blogspot.com/feeds/comments/default?alt=rss

specific label site feed


RSS 2.0: http://blogname.blogspot.com/feeds/comments/default?alt=rss/-/labelname


Replace blogname.blogspot with your blog url.If you are using
specific label rss site feed then change label name with your blog label.

Many blogger add rss feed in their blog and find it useful.As i describe  about atom and rss.These are the two different tags used which provide information about website.but you  have full control on your blog feed .You can allow your visitors full feed, short or customize.You can also disable showing your blog feed.If you want to change the setting of your blog feed go Setting > others 
There you will see option of site feed, you can change to your requirement.

Let me describe you little about the options of site feed.If you select full then blogger will show your all content of your posts and pages and if you select jump break it show content above jump break.If you select short blogger will show few words, and when you select none it shows nothing


Add  Rss feed widget in blog


login to blogger account and go to your blog

Now move to layout and click on add a gadget
Add the rss feed gadget.


Paste your blog rss feed url Click continue 

Select the options to show number of posts,item dates, item sources, and  open links in a new window.

Now save it and you can change position of gadget by dragging.
click save arrangements at the top right corner.

I hope it helps you a lot.In case of any problem you can ask me, i would love to hear your voice.Also do not forget to share and like with your friends.

{ Read More }

How To change Default Comment Avatar In Blogger

As you know the anonymous comment image is blank is blogger.we will change the default avatar with other images.
Anonymous user do not want to show their name and other detail.before publishing comment blogger may ask for security check.


blogger comment


But when if some one comment using google account then image on google plus profile will be shown and if that user have blogger account then blogger icon appear in picture.


How to remove/change default avatar in blogger comment

First you have to login to your account

now go to template and edit HTML

press CTRL+F inside code area then a search box appear

Search for


Style 1
logo


paste the given code before </body>


Style 2


for style 2 add given code before </body>


save your template and keep enjoying.
{ Read More }

How To Add Pinterest Pin It Mouseover Button in Blogger

Adding pinterest pin button in blogger image is a good tool to make you blog famous. Images are essential thing that blogger use in their post so that visitor can easily understand the topic.Pinterest is a searching tool that can be use to find interest of your like while there many board are available on different topic you can pin it so you will view the topic related to the board you had pin it.you can pin it any content on internet.

when user visitor click the red pin it button on image  the add that post in their account but if they not login to pinterest the can not pin it.To pin the post user must have pinterest account.

There are many benefits of adding pinterest button in your blog.First you get many new visitors so your blog page view increase that is the wish of every newbie.
Also Read: how to get more pageviews
Beside that you can make board there and get your blog more famous to gain new and may be unique visitors.


Editing blogger template

To very first step login to your blogger account and then go to your template and edit html.now click inside code area and press cntrl+f and a searching box appear then search the below code.


Add pinterest button code

after you search </body> then paste the given code above </body>


now you can save the template.visit your blog to see you pin it button.Always edit your template correctly if you somehow remove some script code then your template will not work correctly.when you press pin it it will take your post that will show in the profile whoever pin it the post.make sure the image and title are relevant.
{ Read More }

How To Add Border Around Image In Blogger

In blogger template there is no css border design for image but today we will add stylish effect around image.In this tutorial we will add two design on image.


editing template
you can see first design in above image the dotted border.The color is red but you can change it by replacing color code.


Adding border around image

First login to blogger account

Go to template and click HTML

Press CTRL + F and search box this code

 above it paste the below code there.

Dotted border


solid border


to change the color replace #ff3333 with your color code.

Few color codes.


save you template and enjoy the style.
{ Read More }

IconIconIconFollow Me on Pinterest