Search Blog


Simple Blogger Post Slider With Carousel Effect

Post slider is a awesome way to impress your audience.you can place this slider below header.you can add link in this post slider.you can add feature post or popular post,You can add link of your choice its totally customize widget to add any link for slider in blogger.you  have no need to edit your template, just add this widget in gadget of html/javascript by going layout of blogger.this slider become in action when you mover your cursor over slider image and if you click on image it will redirect to link of post you added.when you move cursor toward right slider post move to show more post behind while moving toward left it show more post same wise.


feature post slider for blogger


In below image you can see slider boarder is blue but we can change it.i will describe customization of slider and post.you can change url link to image and when you hover your mouse you can see title of post.It can also be change.while if you want to add more post in slider then you have to do few more step, i will also describe how to add as many post as you want in slider.


How to add feature post slider

Login to blogger account go to layout

Add gadget of Html/javascript 

Paste below code there.

<style>    #BloggerSpiceCarouselSlider {      height:130px;      background-color:#ffffff;      border:2px solid #3399ff;      position:relative;      margin:50px 50px;      overflow:auto;    }        #BloggerSpiceCarouselSlider:before,    #BloggerSpiceCarouselSlider:after {      content:"";      display:block;      position:absolute;      top:0;      bottom:0;      left:-4px;      width:4px;      height:100%;      box-shadow:0 0 4px black;      z-index:10;    }    #BloggerSpiceCarouselSlider:after {      left:auto;      right:-4px;    }/* CarouselSlider by 5gblogger.blogspot.com  */    #BloggerSpiceCarouselSlider .container {      position:absolute;      top:0;      left:0;      margin:5px 0 0 5px;      width:300%;      height:120px;    }    #BloggerSpiceCarouselSlider figure {      display:block;      background-color:white;      float:left;      width:150px;      height:120px;      margin:0 5px 0 0;      position:relative;      overflow:hidden;    }    #BloggerSpiceCarouselSlider figcaption {      display:block;      position:absolute;      right:0;      bottom:-50px;      left:0;      background-color:black;      font:italic normal 11px Arial,Sans-Serif;      color:white;      padding:4px 10px;      text-align:left;      opacity:.8;    }    #BloggerSpiceCarouselSlider figure img {      display:block;      border:none;      margin:0 0;    }    </style>    <div id="BloggerSpiceCarouselSlider">        <div class="container">            <figure>                <a href="#" title="Title for Caption">                    <img alt="" src="https://blogger.googleusercontent.com/img/b/R29vZ2xl/AVvXsEjTjMw-CeQaBs6Q8Y1Rvu8nZHqkMZ3S9UWjYuazi706J8rFtJii-a1GXfqamdVwQD8H2lhE7-jK7_vtk_1OPjKntBPvQ993zW1ElAASdGd51lTp9VJUpMkJLzgzYeoxRCS38yt6tiOxTxU-/s1600/7.jpg" />                </a>            </figure>            <figure>                <a href="#" title="Title for Caption">                    <img alt="" src="https://blogger.googleusercontent.com/img/b/R29vZ2xl/AVvXsEjlvhwswF4FaoCuX-bGWbXIXO4VURiC2Q9fll1iq2i_iOkwF1qzGvDRAWITzRJUNfXjdUx0c0wy1uJZasz4da8T3q-l-TJZxmeQlABnHJakfMZHMyPKKKh7ef9FjgvsO22BPXHtUA6bZE_X/s1600/9.jpg" />                </a>            </figure>            <figure>                <a href="#" title="Title for Caption">                    <img alt="" src="https://blogger.googleusercontent.com/img/b/R29vZ2xl/AVvXsEjoHq3oDJYIJITOPe-gMILkA_AahJP-42Q78r8S1XmtL4QxhizieZBDvGJfcQYym3FpOoKG0jl_OpEy201xW-bVi8Z-yEv0f5YYqCuqE5L8dAsHszn6Q9872uuhDTC2DWKoKr4U192ZQt4B/s1600/10.jpg" />                </a>            </figure>      <figure>                <a href="#" title="Title for Caption">                    <img alt="" src="https://blogger.googleusercontent.com/img/b/R29vZ2xl/AVvXsEgnNRP73MYQYPVx7FX2W6dbTZZOhcPDZDeNHVfJgdrCaT0EqxD9cV6ZNX3Ohj2_jORauqbZ0KQjKjLEC2Aerw3dpZTA4zD6ldl1o-uGe_V05TZyG-2NqNlSCUYM5fPatTql8ggNi-TPRv3E/s1600/8.jpg" />                </a>            </figure>            <figure>                <a href="#" title="Title for Caption">                    <img alt="" src="https://blogger.googleusercontent.com/img/b/R29vZ2xl/AVvXsEhgVnb6hyo-8qNd55kEgZz7bC1Rv5QLMWkYk_KPTuMDVlyz2qxKk42Y_szUhCEq-a_3bdRROcB8qpJCUnaQvJlTK0vSPb4topcNDviwNtYiAeWim2MUnNuL6i8lE6Xy3y2l1Bhoevaxoufd/s1600/6.jpg" />                </a>            </figure>            <figure>                <a href="#" title="Title for Caption">                    <img alt="" src="https://blogger.googleusercontent.com/img/b/R29vZ2xl/AVvXsEiQFgJcebk5BHb14Py7gb-I8ZPHYaCshpEXUwbJZBNh0PUpdZdEpBT7bIe3E-gWoJjkp_3UdFKKofeD77PTDVWEvS9CawDGJ1g1UaCMvMzU1P8HaGzjWrrXELBRbGwmiN9m8V_rSY6X3-mL/s1600/4.jpg" />                </a>            </figure>      <figure>                <a href="#" title="Title for Caption">                    <img alt="" src="https://blogger.googleusercontent.com/img/b/R29vZ2xl/AVvXsEgOczrUjVemE-2HKkNPCXiaGRC11FQuvQtsr1YXNrQjP6MWssMoRX11uxgj0YeHqnUcPqZ9tryQd5vurn-quGKggiV8sImqp2R6Fcann7sB2OqvtmfXkjwNUssTeQpssWKDZsBlicf_D4B7/s1600/3.jpg" />                </a>            </figure>            <figure>                <a href="#" title="Title for Caption2">                    <img alt="" src="https://blogger.googleusercontent.com/img/b/R29vZ2xl/AVvXsEiRMGGh7NiSYGOSObVJG_ZcfcQGpDq4JteCsxCWbUStyRD_OMKXu4mVzwC6TlToykO-Kww8yGCtLrKe499hazs2zFDBdA-cnB6SA0cgin2RSJse30kRNytwS-n8mG7skv8hutlnP0TL-s_k/s1600/2.jpg" />                </a>            </figure>            <figure>                <a href="#" title="Title for Caption">                    <img alt="" src="https://blogger.googleusercontent.com/img/b/R29vZ2xl/AVvXsEjPU3ey6QMPuTidu8U-Pa0BKThzCM1EOlB2INhDpRo7_69NpMmoW_YiW90WcKj-2AqlvQYkx3wud8weygjlXFRPJ1VL7f7oT7Rq2iVR3wxsYzDVCRveh2Z9CvhxweKgWsCDVOU5fyugsbaZ/s1600/1.jpg" />                </a>            </figure>        </div>    </div>
    <script type='text/javascript' src='https://ajax.googleapis.com/ajax/libs/jquery/1.7.2/jquery.min.js'></script>    <script type='text/javascript'>//<![CDATA[    (function($) {        var config = {            itemMargins: 5 // Distance between the thumbnails        };        var $thumbnailScroller = $('#BloggerSpiceCarouselSlider'),            $container = $thumbnailScroller.find('.container'),            $item = $container.find('figure'),            item_length = $item.length,            item_width = $item.outerWidth(),            item_margin = config.itemMargins,            total_width = (item_width + item_margin) * item_length,            $window = $(window);        $thumbnailScroller.css('overflow', 'hidden');        $container.css('width', total_width);        // Auto caption builder & hover effect        $item.each(function(cap) {            if ($(this).children().attr('title')) {                cap = $(this).children().attr('title');                $(this).children().removeAttr('title');                $(this).append('<figcaption>' + cap + '</figcaption>');            }        }).hover(function() {            $(this).find('figcaption').stop().animate({                bottom: 0            }, 200);        }, function() {            $(this).find('figcaption').stop().animate({                bottom: -50            }, 200);        });        $window.on("resize", function() {            var o_l = $thumbnailScroller.offset().left,                t_w = $thumbnailScroller.width(),                c_w = total_width;            $thumbnailScroller.on("mousemove", function(e) {                if ($(this).width() < $container.width()) {                    $container.css('left', -((e.pageX - o_l) * (c_w - t_w) / t_w));                }            });        }).trigger("resize");    })(jQuery);    //]]>    </script>

Place the gadget below header and do not forget to save arrangements.


How to change image and links in slider

You will find many section like this in above code highlighted in red color.


<figure>
                <a href="#" title="Title for Caption">
                    <img alt="" src="image url" />
                </a>
            </figure>

Change # with link of your post link

Replace Title for Caption with your post title, use small title for post.

Upload your image on blogger or any where on internet.copy your image url and replace it with image url in slider.

Remember use image of 150px width x 120px height


Save gadget after every change.Enjoy beautiful post slider in blogger.I have tested this slider widget, it is working fine but if you have any problem in installing feel free to ask me.Also hit like if you think this post is helpful.
{ Read More }

Add Share To Unlock Social Content Locker In Blogger

Social sharing website are very popular now a days.Social content locker widget helps bloggers to gain little more likes and shares.This content locker widget include facebook, twitter and google plus share buttons.Billions of people daily visit social sharing websites.you can not ignore its importance, it is a good way to boost your traffic.Many professional blogger only getting traffic from social sharing sites.Search engine are updating algorithm frequently, social signals are also make count in your website ranking.I personally experience its value when i start using facebook twitter and other websites for promotion of website.

share to unlock in blogger

It is a bare fact that all blogger add social sharing buttons in their blogs but still there are some people who do no like to appreciate your work.They have enough time to read the article but they have no time to share and like your post.Actually they have time to like but they do not hit like button.Today i am introducing you a widget for blogger that can force your readers to hit on share button.

Today we will add social content share locker in blogger.you can lock any downloading link or any other content.When visitor go to that page, a pop up appears, which ask to like and share to unlock.If you lock a downloading link and visitor try to click on that link, spontaneous pop up appear asking to hit like and share button to unlock content

How to add share to unlock in blogger


Search for

</head>

Before </head>  paste the given code

<link href='https://dl.dropboxusercontent.com/u/137869302/lockercss.css' rel='stylesheet' type='text/css'/>

Save the template.

Make new post or edit old post.Go to Html editor of post.

Paste the below code.

Replace "Add_Hidden_Image_Here" with the Image url you want to lock.
Replace "Add Your Hidden Text Here" With the text that you want to lock.

<article id="default-usage">
<div class="to-lock" style="display: none;">
   
<!--Hidden Content Starts (You can Use HTML BELOW)-->
<div style="text-align: center; margin-bottom: 20px;">
<img src="Add_Hidden_Image_Here" alt="" style="margin: auto;" />
</div>
<div style="text-align: justify">
Add Your Hidden Text Here</div>
<!--Hidden Content Ends (You can Use HTML ABOVE)-->
</article>
</div><div id="mblunlocker"> </div>
<script type="text/javascript" src="https://dl.dropboxusercontent.com/u/137869302/lockers.js"></script>
<script>
jQuery(document).ready(function ($) {
$("#default-usage .to-lock").socialLock({
text: {
header: "Share it To Unlock This Content",
message: "Yes, this is Social Locker. Just try it, click on one of buttons."
},
style: "ui-social-locker-secrets",
buttons: {
order: ["twitter", "facebook", "google"]
},
// twitter options
twitter: {
url: "https://twitter.com/your account",
text: "Upgrade your social buttons to get more social traffic!"
},
// facebook options
facebook: {
url: "https://www.facebook.com/page url",
appId: "1469022373353333"
},
google: {
url: "https://plus.google.com/u/0/115165309413108113943"
}
});
});;;;
   
</script>

Now Replace the Twitter, google plus link with your pages, also change facebook page and api with yours which is Highlighted in red color.


Recommendation

Try to avoid using social sharing content locker on every post because it can make visitors irritate and they can leave your blog.your content locker widget share to unlock is installed.Now its your turn to hit like button.

Search Tags:like to unlock, share to unlock widget for blogger,social content locker for blogger.

{ Read More }

How To Add Drop Down Label Widget In Blogger

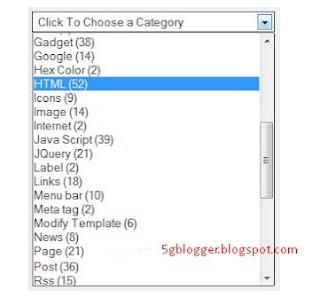
This tutorial is of category list and for drop-down label menu.It work or show list of labels mostly shown  at the side bar while you can change the position of gadget.

If you want to decrease main navigation bar size, this can help to you do so.this drop-down menu display your label categories,and labels are link with them.each category show post added in label .you can adjust size of the drop-down. follow these steps to add it to your blog.

drop down menu of lablel

Adding drop down category widget in blogger


login to blogger account Go to template and edit HTML


 Find below code by using Ctrl+F 


Replace above line with below code.


now save your template and go to your blog and check either widget is working correctly or not. 

if you had any problem you can ask me in comment.
{ Read More }

Add Five Star Rating widget In Blogger

Rating widget is beneficial for online shopping store sites or movies blog or any to rate any product.while five star widget can be added to any article site.It used as feedback, may be you have seen in other blog at the bottom of post.

Fist i tell you about this widget.It show text rate this rate this post with five star.you have to edit blogger template to show in your blog.It also show how many people rate this post votes.before editing blogger template take backup of your template

adding rate this post


It is used to restore your template if you did some mistake so that can be recovered easily.this widget also increase beauty of your blog.you can add floating search box to stylize your template.

How to create five star rating in blogger

First login to blogger account

Go to template edit HTML


modify blogger template
Now search for his code 


Above </head> paste the given code.


Find this one


Just below <data:post.body/> paste give script.


Note:you may find <data:post.body/> more than time,in that case place this script below the last one.save your template.

View your blog that your five star widget is working fine.If it is not working then you have to place this script below all <data:post.body/> tags.

{ Read More }

Floating Search Box With On click Effect For Blogger

This is very important gadget for blog because user can search to get required topic.we have already added a simple color full search box later but this widget is stylish with some more effects.

Adding this gadget in blogger is very easy.this is very beautiful gadget with blue search button while when some one click in the box it expand so that you can write more words there.
you can also add vertical floating social share button

find box

How to add search box in blogger

First login to blogger account


go to layout and add a gadget of  Html/Javascript


Now paste the below code there and save it the gadget


visit your blog and see your widget is working fine.
{ Read More }

Horizontal Social Sharing Widget With Hover Effect For Blogger

In previous tutorial we have learn how to floating social sharing
button while today we will add new widget that has amazing effects It has horizontal sharing button for blogger.It has beautiful green color with social media icons while when you have mouse hover on them,button become colorful and it looks awesome.

why to add this widget

Now i will tell you some thing about this widget.It has six sharing media button.first one is facebook, which is most popular.Adding this widget allow visitors to share your post.this widget float in horizontal mode, Twitter,instagram, pinterest, linkedin, google plus.It promote your blog increase your blog viewers.


horizontal sharing button for blogger

How to add horizontal social sharing widget

This widget is very simple to add. follow me in few steps

login to blogger account and edit Html


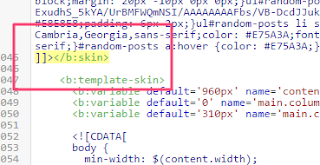
Find this piece of code


paste the below code before ]]></b:skin>


Again find below code


If not found try to find this


paste the below code after <data:post.body/> or
 <div class='post-footer'>


Save the template and enjoy beautiful horizontal share widget.If you face any problem or have any suggestion inform me by your comment
{ Read More }

Add Random Post Widget With Round Thumbnail In Blogger

we use label to arrange post but if you have blog and updating daily with new things then you may have many post.Random post widget is the need of that blogger blog so visitor can access to more random post.while you can also use other widgets.


Also you can Add Multi Color Recent post widget to get more expose of your blog.

random post widget with thumbnail

Before i tell you how to add random post widget in blogger i would like to tell you about random post widget and its feature.The title of post has font size of 11px  while image thumbnail had radius of 70px.Random articles are like related article, this widget will show three random post with round image thumbnail and title snippets.It show articles randomly.Also it show the date of articles publish and how many comments on that post.

How to add Random post widget in blogger

1 First login to your blogger account and go to your blog.

2 Go to template and edit Html

3 Find this code
]]></b:skin>


adding design of blog

4 Copy the below code and paste above  ]]></b:skin>


 /* Random Posts Style */#random-posts img {float: left;margin-right: 10px;width: 45px;height: 45px;background-color: #EEEEEE;padding: 3px;border-radius: 70px;}ul#random-posts {list-style-type: none;width: 304px;float: right;display: inline-block;margin: 20px -10px 0px 0px;}ul#random-posts li {margin-bottom: 3px;background: url(https://blogger.googleusercontent.com/img/b/R29vZ2xl/AVvXsEiLNv9nfLOaKQo_Cb2TunJuCSnteDmpv2i_RORiWXdV0RLkpxjEeUvOg7YjbtL0mj0yc6JvuvpO_iEQtCopAa_0hYOkcOeCtXLu39cNM9vxop_feTHNH0vJji5dO_6JYh00RX5KJ15RVdP1/s1600/blockquote-bg.png);background-repeat: repeat;border-bottom: 1px solid #E8E8E8;padding: 6px 2px;}ul#random-posts li span {font: 11px Cambria,Georgia,sans-serif;}#random-posts h4 {font: 15px Cambria,Georgia,sans-serif;color: #E75A3A;font-weight: bold;}#random-posts a {color: #222;font: 12px Cambria,Georgia,sans-serif;}#random-posts a:hover {color: #E75A3A;}

5 Now go to layout and add gadget of html/javascript

Paste then below code there


<ul id='random-posts'>
<script type='text/javaScript'>
var rdp_numposts=4;
var rdp_snippet_length=150;
var rdp_info='yes';
var rdp_comment='Comments';
var rdp_disable='Comments Disabled';
var rdp_current=[];var rdp_total_posts=0;var rdp_current=new Array(rdp_numposts);function totalposts(json){rdp_total_posts=json.feed.openSearch$totalResults.$t}document.write('<script type=\"text/javascript\" src=\"/feeds/posts/default?alt=json-in-script&max-results=0&callback=totalposts\"><\/script>');function getvalue(){for(var i=0;i<rdp_numposts;i++){var found=false;var rndValue=get_random();for(var j=0;j<rdp_current.length;j++){if(rdp_current[j]==rndValue){found=true;break}};if(found){i--}else{rdp_current[i]=rndValue}}};function get_random(){var ranNum=1+Math.round(Math.random()*(rdp_total_posts-1));return ranNum};
</script>
<a style="font-size: 0px; color: #fcfcfc; float: right; margin: 5px;"   href="http://5gblogger.blogspot.com/2016/01/add-random-post-widget-in-blogger.html"  rel="dofollow">random post Widget</a>
<script type='text/javaScript'>
function random_posts(json){for(var i=0;i<rdp_numposts;i++){var entry=json.feed.entry[i];var rdp_posttitle=entry.title.$t;if('content'in entry){var rdp_get_snippet=entry.content.$t}else{if('summary'in entry){var rdp_get_snippet=entry.summary.$t}else{var rdp_get_snippet="";}};rdp_get_snippet=rdp_get_snippet.replace(/<[^>]*>/g,"");if(rdp_get_snippet.length<rdp_snippet_length){var rdp_snippet=rdp_get_snippet}else{rdp_get_snippet=rdp_get_snippet.substring(0,rdp_snippet_length);var space=rdp_get_snippet.lastIndexOf(" ");rdp_snippet=rdp_get_snippet.substring(0,space)+"&#133;";};for(var j=0;j<entry.link.length;j++){if('thr$total'in entry){var rdp_commentsNum=entry.thr$total.$t+' '+rdp_comment}else{rdp_commentsNum=rdp_disable};if(entry.link[j].rel=='alternate'){var rdp_posturl=entry.link[j].href;var rdp_postdate=entry.published.$t;if('media$thumbnail'in entry){var rdp_thumb=entry.media$thumbnail.url}else{rdp_thumb="https://blogger.googleusercontent.com/img/b/R29vZ2xl/AVvXsEhYMliyzU397cqnhjDQck-wGKCtUQDiYYjqaVvbjVCIgqofuz3M4Oi_ZgBMf39daIeifWY2t6anm8OfTZCvQdoDCk1C1fvhQ4LSIRX4_sr3EF0F256xIvU9siGwKPA7t6Zh0pW8KzV4tyE/s1600/no_thumb.png"}}};document.write('<li>');document.write('<a href="'+rdp_posturl+'" title="'+rdp_snippet+'"><img alt="'+rdp_posttitle+'" src="'+rdp_thumb+'"/></a>');document.write('<div><a href="'+rdp_posturl+'" title="'+rdp_snippet+'">'+rdp_posttitle+'</a></div>');if(rdp_info=='yes'){document.write('<span>'+rdp_postdate.substring(8,10)+'/'+rdp_postdate.substring(5,7)+'/'+rdp_postdate.substring(0,4)+' - '+rdp_commentsNum)+'</span>'}document.write('<div style="clear:both"></div></li>')}};getvalue();for(var i=0;i<rdp_numposts;i++){document.write('<script type=\"text/javascript\" src=\"/feeds/posts/default?alt=json-in-script&start-index='+rdp_current[i]+'&max-results=1&callback=random_posts\"><\/script>')};
</script>
</ul>


6 Save the gadget now visit your blog to confirm.you can see random post are displayed.

Note: this random article widget show five number of post.you can change it by editing to your requirement.


Customization of widget

To change number of random post displayed look at third line in above code,that is var rdp_numposts=4; change number four to your choice number.

It also show date of articles published. and comment on random post, you can also hide it.so if you want to remove date and number of comment, beneath random post title look at fifth line of above code that is var rdp_info='yes'; change yes to no and save the gadget.

Also If your random post widget width is not match to your blog sidebar.you can adjust position of the widget.To change look at code of step 4.you can see 304 lighted in red color.increase or decrease widget width according to your requirement.

you are done.Enjoy beautiful random post in blogger.if you have any query feel free to ask.

If you have problem in design of random post widget then you have to do few additional steps.remove the code that you have added  above  ]]></b:skin> in your template.


GO to template and click customize go to advanced then click on add css, copy the code from step 4 and paste it there and click apply to blog.Now your random post design work properly
{ Read More }

IconIconIconFollow Me on Pinterest